Blog Archives
5 Step Asian Skincare Routine

A friend of mine who launched her own skincare line last year just recommended this book.
The Japanese Skincare Revolution is a fabulous book about how to take care of your skin at home, at any age. The author, Chizu Saeki is an esthetician and beauty consultant in Japan. She also teaches, writes, and tours to demonstrate her techniques for skin care.
After reading some of the reviews online, I stumbled upon the idea of the “5 Step Asian Skin Care Routine.” I’ve been caring for my face using these 5 steps for about 4 months now, and even other people are starting to notice a difference!
5 Step Asian Skincare Routine
1. Double Cleansing
First you use an oil to cleanse your face. This makes sense since most makeup is oil based. I like to use coconut oil because it is 1) antimicrobial and gets rid of any bacteria on my face – goodbye acne! and b) because on a molecular level, coconut oil is small enough to penetrate the skin the moisture is actually absorbed – goodbye wrinkles! Now, this is still a 2-part process. For the second part of the double cleansing, I use a soap-free moisturizing cleanser.
2. Facial Massage/Mask
Normally I combine the massage step into step 1 when I have the coconut oil on my face. Massage in a sweeping upward motion until the skin attains a slight flush – this way you know you’ve activated the blood flow to the area, which will help nourish the cells. About once a week I’ll add in the facial mask step. You’ll need to use a mask that’s right for your skin type. Clay masks are better for oily skin, and the lotion mask that Chizu Saeki demonstrates in the video below is amazing!
3. Toner
Now I know a lot of people think toners are obsolete, but seriously what can be better than smoothing your skin with rosewater after you’ve cleansed? Even the aromatherapy benefits alone are worth it! Toners help to remove dead skin cells, replenish your skin with moisture after cleansing, and make the absorption of any subsequently applied products easier and faster.
4. Facial Serum
A facial serum has smaller molecules than a moisturizer. These molecules penetrate the deeper layers of the skin, brining more nutrients to these important areas. The consistency is similar to that of a very light lotion or gel. There are many different types of serums: anti-aging, brightening, and firming are some examples. Image Skincare makes this Vital C Hydrating Anti-Aging Serum that works great and smells like orange sorbet! It’s best if you apply the serum and then wait 5-10 minutes before applying your moisturizer. This gives the serum time to penetrate to the deeper levels of your skin.
(I also like to add in a step here for eye cream!)
5. Moisturizer
I thought that because I have combination skin I was okay just using a serum, but my esthetician told me otherwise! A good moisturizer is your best friend, you just have to pick one that’s right for your skin type. The type of moisturizer may also change depending on the seasons, or climate if you’re traveling.
It might sound like a lot of work at first, but once you establish a routine it won’t seem like a big deal. The importance of maintaining the routine was made clear to me recently when I was traveling and only took along some facial cleansing wipes. The overall luster and brightness of my skin was significantly reduced, and I noticed a few black heads and red spots. Nothing that wasn’t remedied by returning to my routine when I returned home, but still eye opening!
Here’s that fabulous video of Chizu Saeki demonstrating the lotion mask:
DIY Nourishing Hair Masque
DIY Hair Mask!
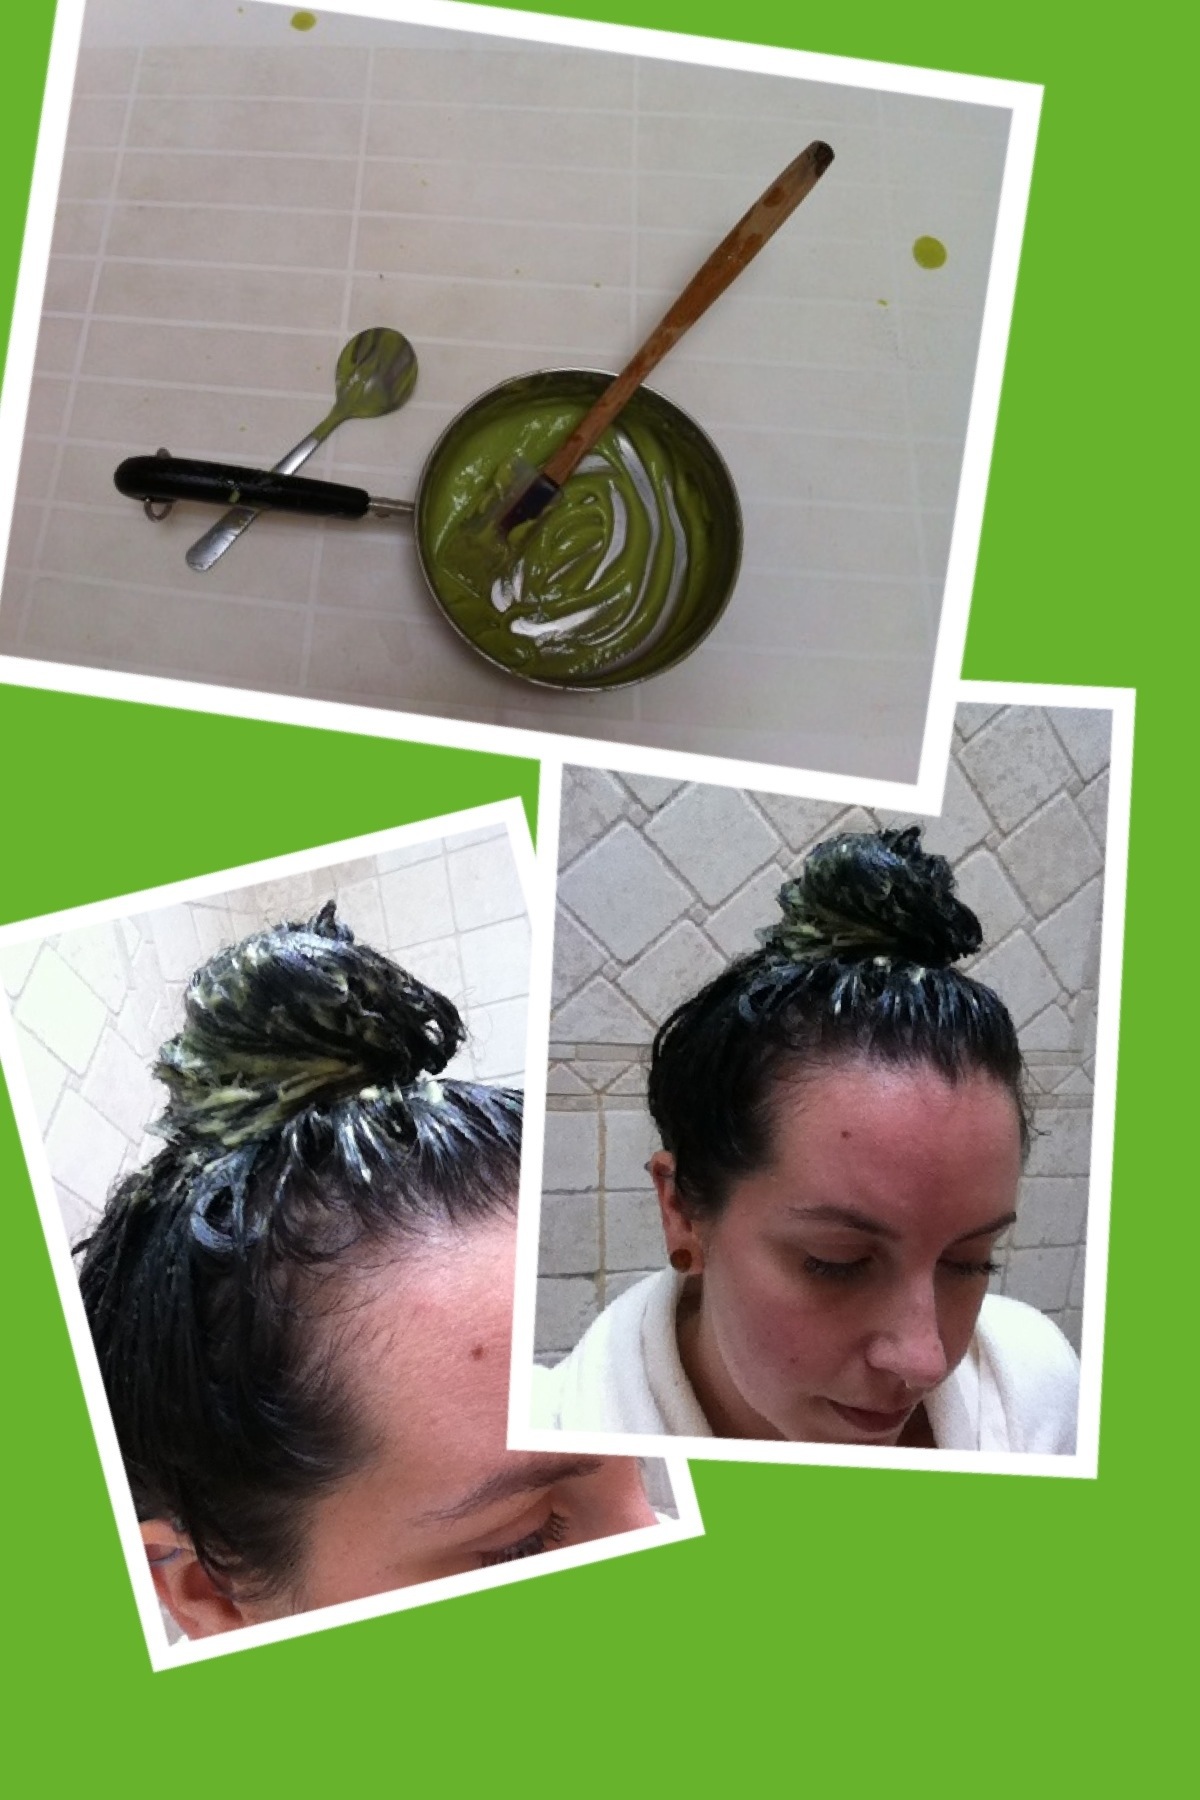
Today I finally tried out a DIY Hair Mask recipe I’ve been wanting to do for a while. The initial recipe called for an avocado, coconut milk, and olive oil. However, I had a hunch that coconut oil would actually be better for my hair.
I did some research here, here, and here and decided to switch the olive oil to coconut oil. I only used half of an avocado, and just kind of eyeballed it for the coconut milk & oil. I definitely used more than 3 tsp of oil – probably more like 7 tsp. After warming the coconut milk & oil on the stovetop, I added the 1/2 avocado and used an immersion blender to combine everything. The result was a beautiful bright green, creamy concoction! I was very pleased with the consistency. It was not too soupy, and very easy to apply.
That said – I would definitely recommend applying the mixture over the edge of the bathtub, just to be on the safe side.
After piling my hair on top of my head and catching up on some light reading for about 30 minutes, I proceeded with my normal shower routine and washed my hair as usual.
When I dried my hair I noticed my hair was A LOT softer than normal! Fantastic! Even today, after the second washing, my hair still feels very soft.
BOTTOM LINE: Fabulous mask, very easy to make and use, smells great, and good results! I wish the softness would last a bit longer, but maybe that will come with time. Definitely going to do it again!